PREPARING A QUICKBOOKS® WORKSHEET
TIME
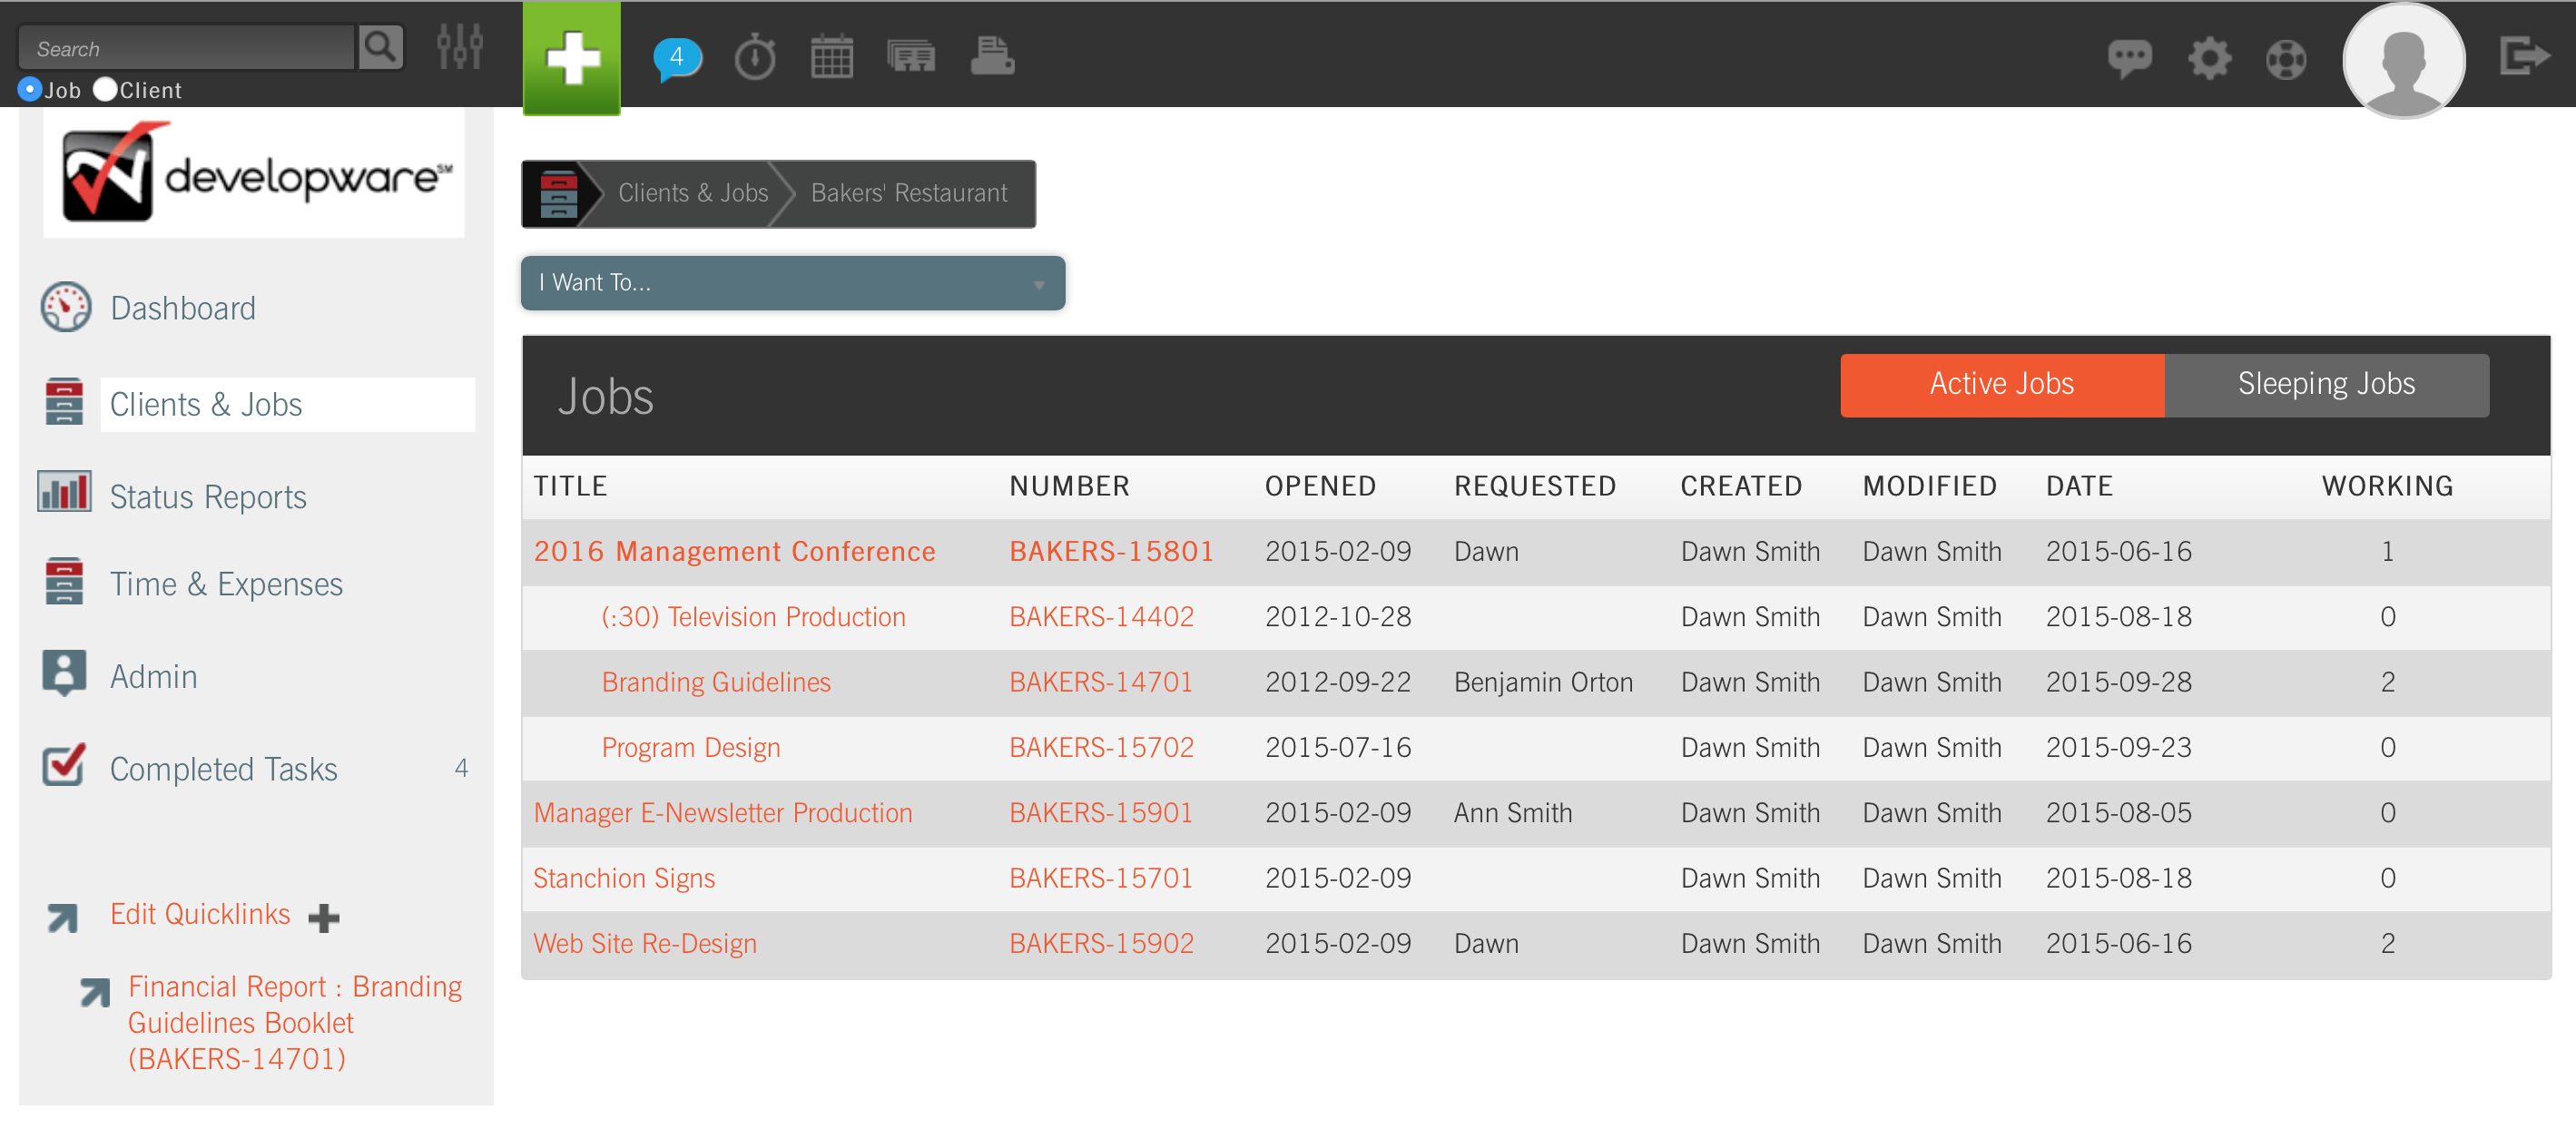
First, navigate to the job by going to Clients & Jobs — Client — Job One Sheet. Once inside the job folder, select Prepare QuickBooks Worksheet from the I Want To: drop-down menu.
NOTE: You must have Permission to Create QuickBooks Worksheet. To grant access, via the Manage Permissions interface, a System Administrator must go to Admin — System Administration — Manage Permissions. S(he) can then specify which Employee(s) should be allowed to Create QuickBooks Worksheet by entering the name(s) in the field provided.
TIP: Mirror your CurrentTrack and QuickBooks Client names to avoid duplicate account creation.
All time entered in CurrentTrack, for the job you’re viewing, will automatically be available to either sync with QuickBooks or write off. If you need to modify Worksheet time, go to Admin — Agency Administration — Manage Time Sheets — Edit Employee’s Time Sheet. Choose the Employee from the drop-down menu and enter the Date you’d like to modify. Once you click Submit, you’ll be redirected to the edit screen of the Sheet. Make any necessary changes and click Submit; click Complete Time Sheet. Unlike when an Employee enters his/her own time, CurrentTrack will allow you, as a user with Permission, to submit a Sheet containing a Sleeping job. Simply confirm that your billing records are accurate.
TIP: Advise Employees to indicate when they begin and finish a Task in the Time Memo field of their Time Sheet (e.g. 8:30 – 9:00 a.m.).
Within the QuickBooks Worksheet, you don’t have to enter a total if you’ve not yet decided to bill (or to write off) the time. It will simply remain in the Worksheet until the next time you Prepare QuickBooks Worksheet. An Employee’s Total Hours reflects the grand total per Work Code (e.g. A = 3.50), instead of the alternative line-by-line format seen in each individual Time Sheet.
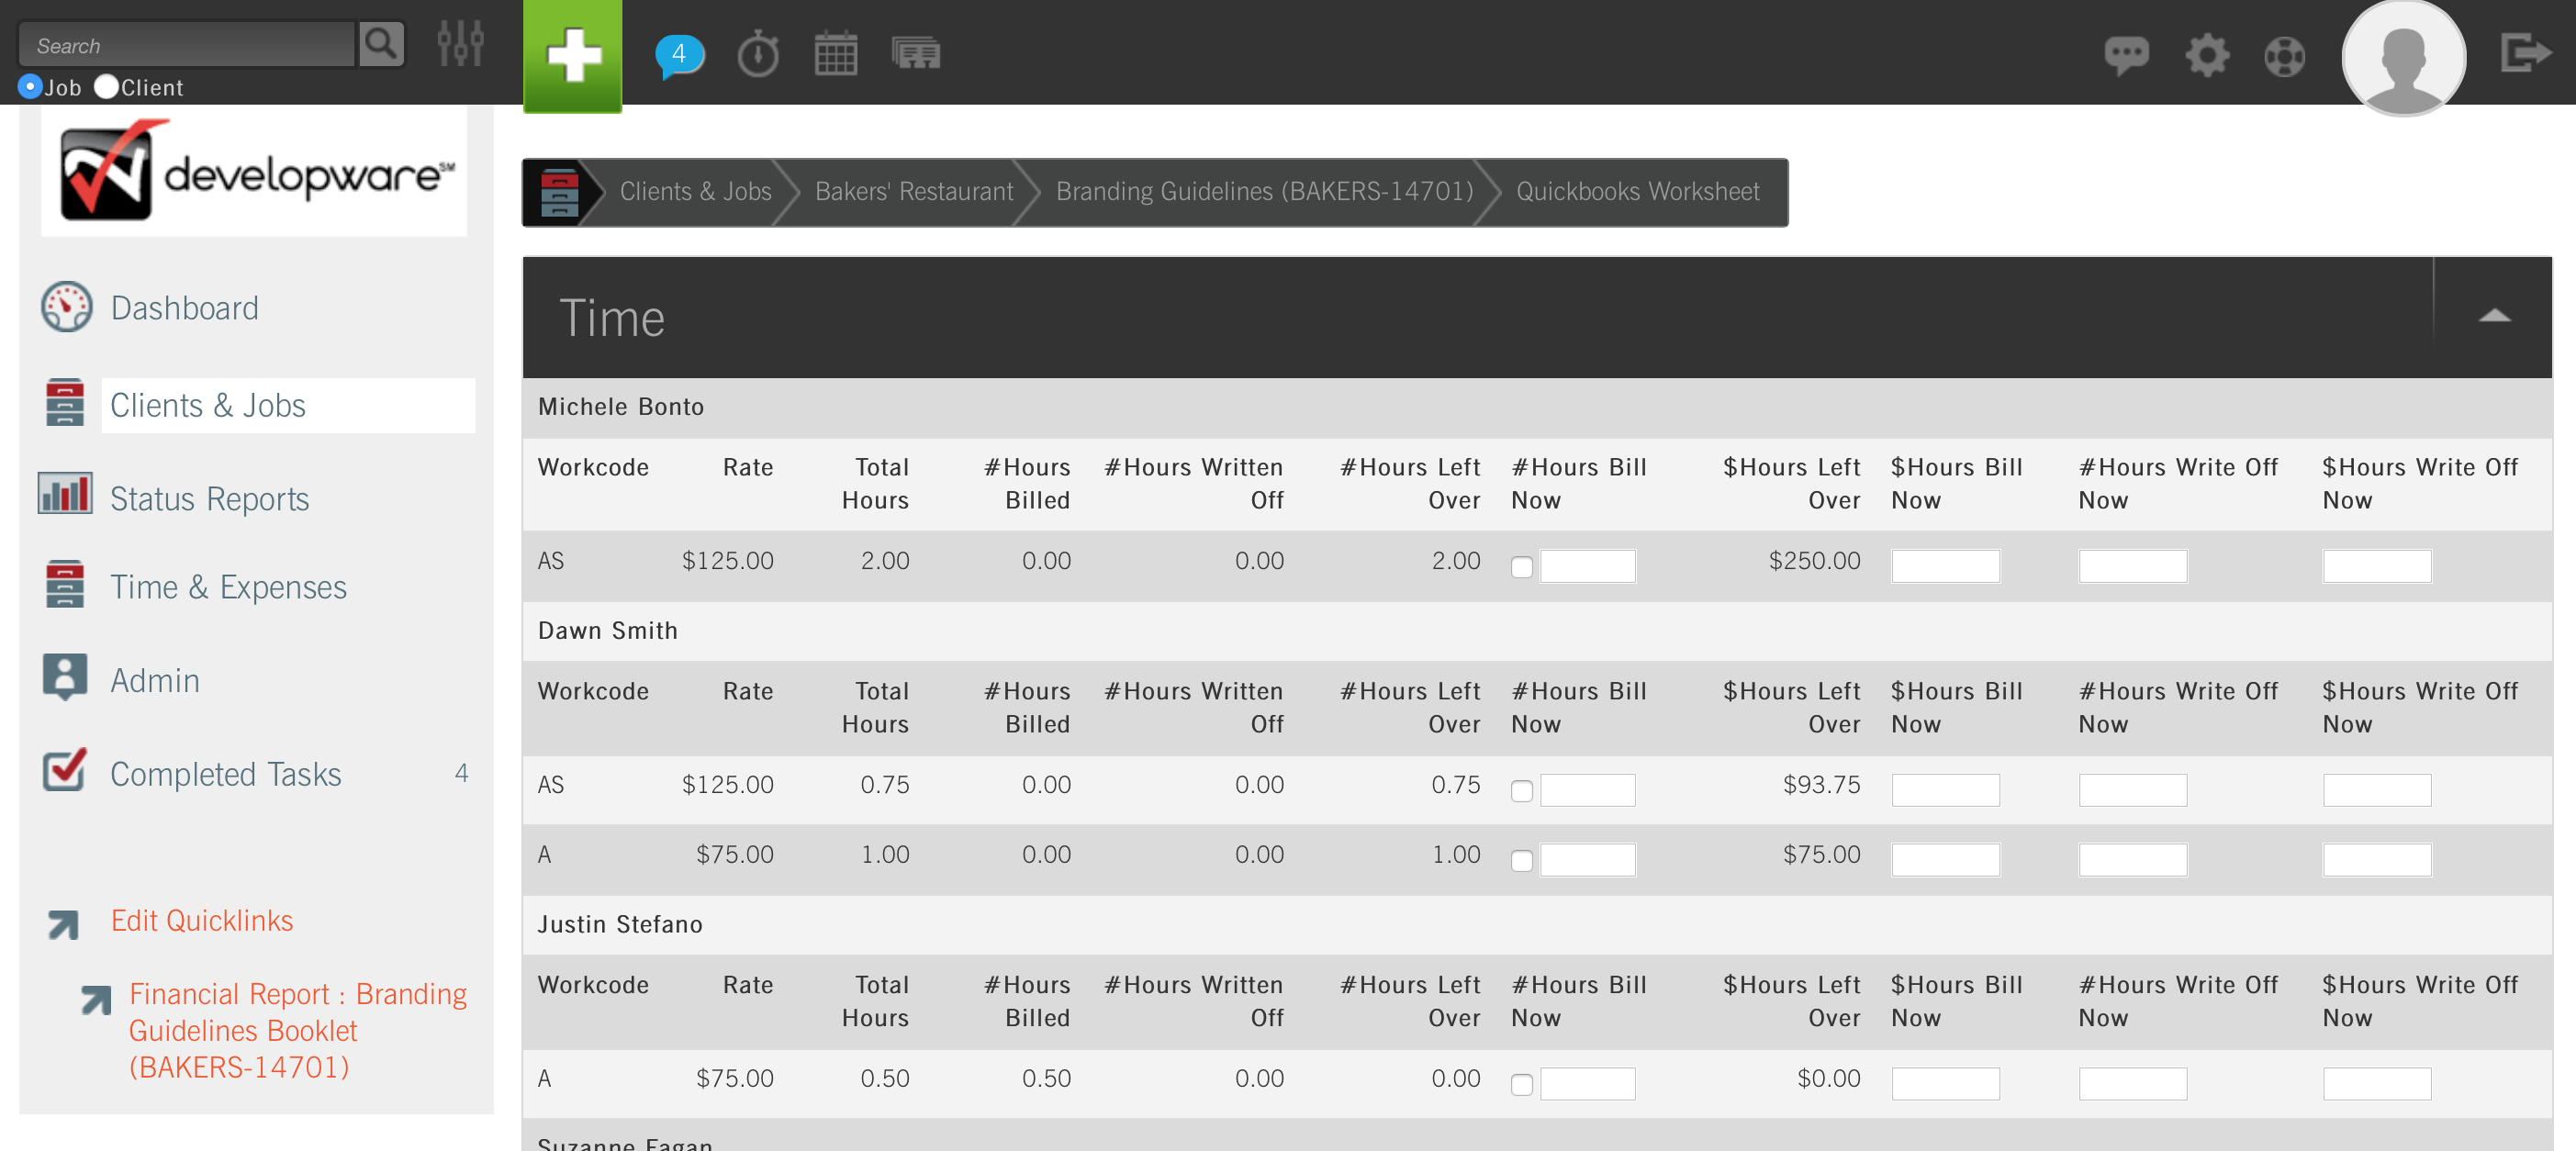
In the above example, Michele Bonto has 2.0 Hours recorded against the Work Code “AS.” It has an associated Rate of $125.00/hr. No “AS” time has been submitted for sync with QuickBooks yet, as seen in the column for #Hours Billed (i.e. 0.00). The column for #Hours Written Off further tells us no time has been written off for this Employee and Work Code. Since this is a summary of time entered by an Employee, on a Work Code basis, it’s cumulative. That’s why we have the #Hours Left Over column. This column tells us what’s left to bill after the Hours that have already been billed (and written off) have been accounted for. Since we’ve not done either in this example, we still have the full amount of $250.00 left over to either bill or write off (see $Hours Left Over column).
Depending on your preference, you can choose one of two options:
1) Enter the number of Hours you wish to bill for in the Bill #Hours Now field. CurrentTrack will automatically calculate the Bill $Hours Now figure for you.
2) Enter the dollar amount you wish to bill for in the Bill $Hours Now field. CurrentTrack will automatically calculate the Bill #Hours Now figure for you.
TIP: Avoid using comma + number combinations (e.g. 1,000.00) in the provided fields. Only a decimal point is necessary.
The corresponding Write Off #Hours Now and Write Off $Hours Now fields work in the same way, with the exception that these fields are for time you’ll never bill. If you wish to only bill half of the Hours now and half of the Hours later, then you’ll NOT use these fields.
Next, review the P.O.s associated with the job and determine what should be billed. Click here for more information. Do the same for Employee Expenses and Media. When finished, sync the Worksheet. After submitting the Worksheet within CurrentTrack, it’s not automatically copied into QuickBooks. It’s simply ready for QuickBooks retrieval. Launch the QuickBooks Connector, via either the desktop icon or your Start menu, and click Sync. Progress can be monitored within the Current Sync Progress tab.


By default, CTTIME is the Item Code associated with Time Sheet values transferred to QuickBooks. You can overwrite the Item Code with any Code you’d like, but the default Code will still appear in the Billing Entry created in CurrentTrack. For example:


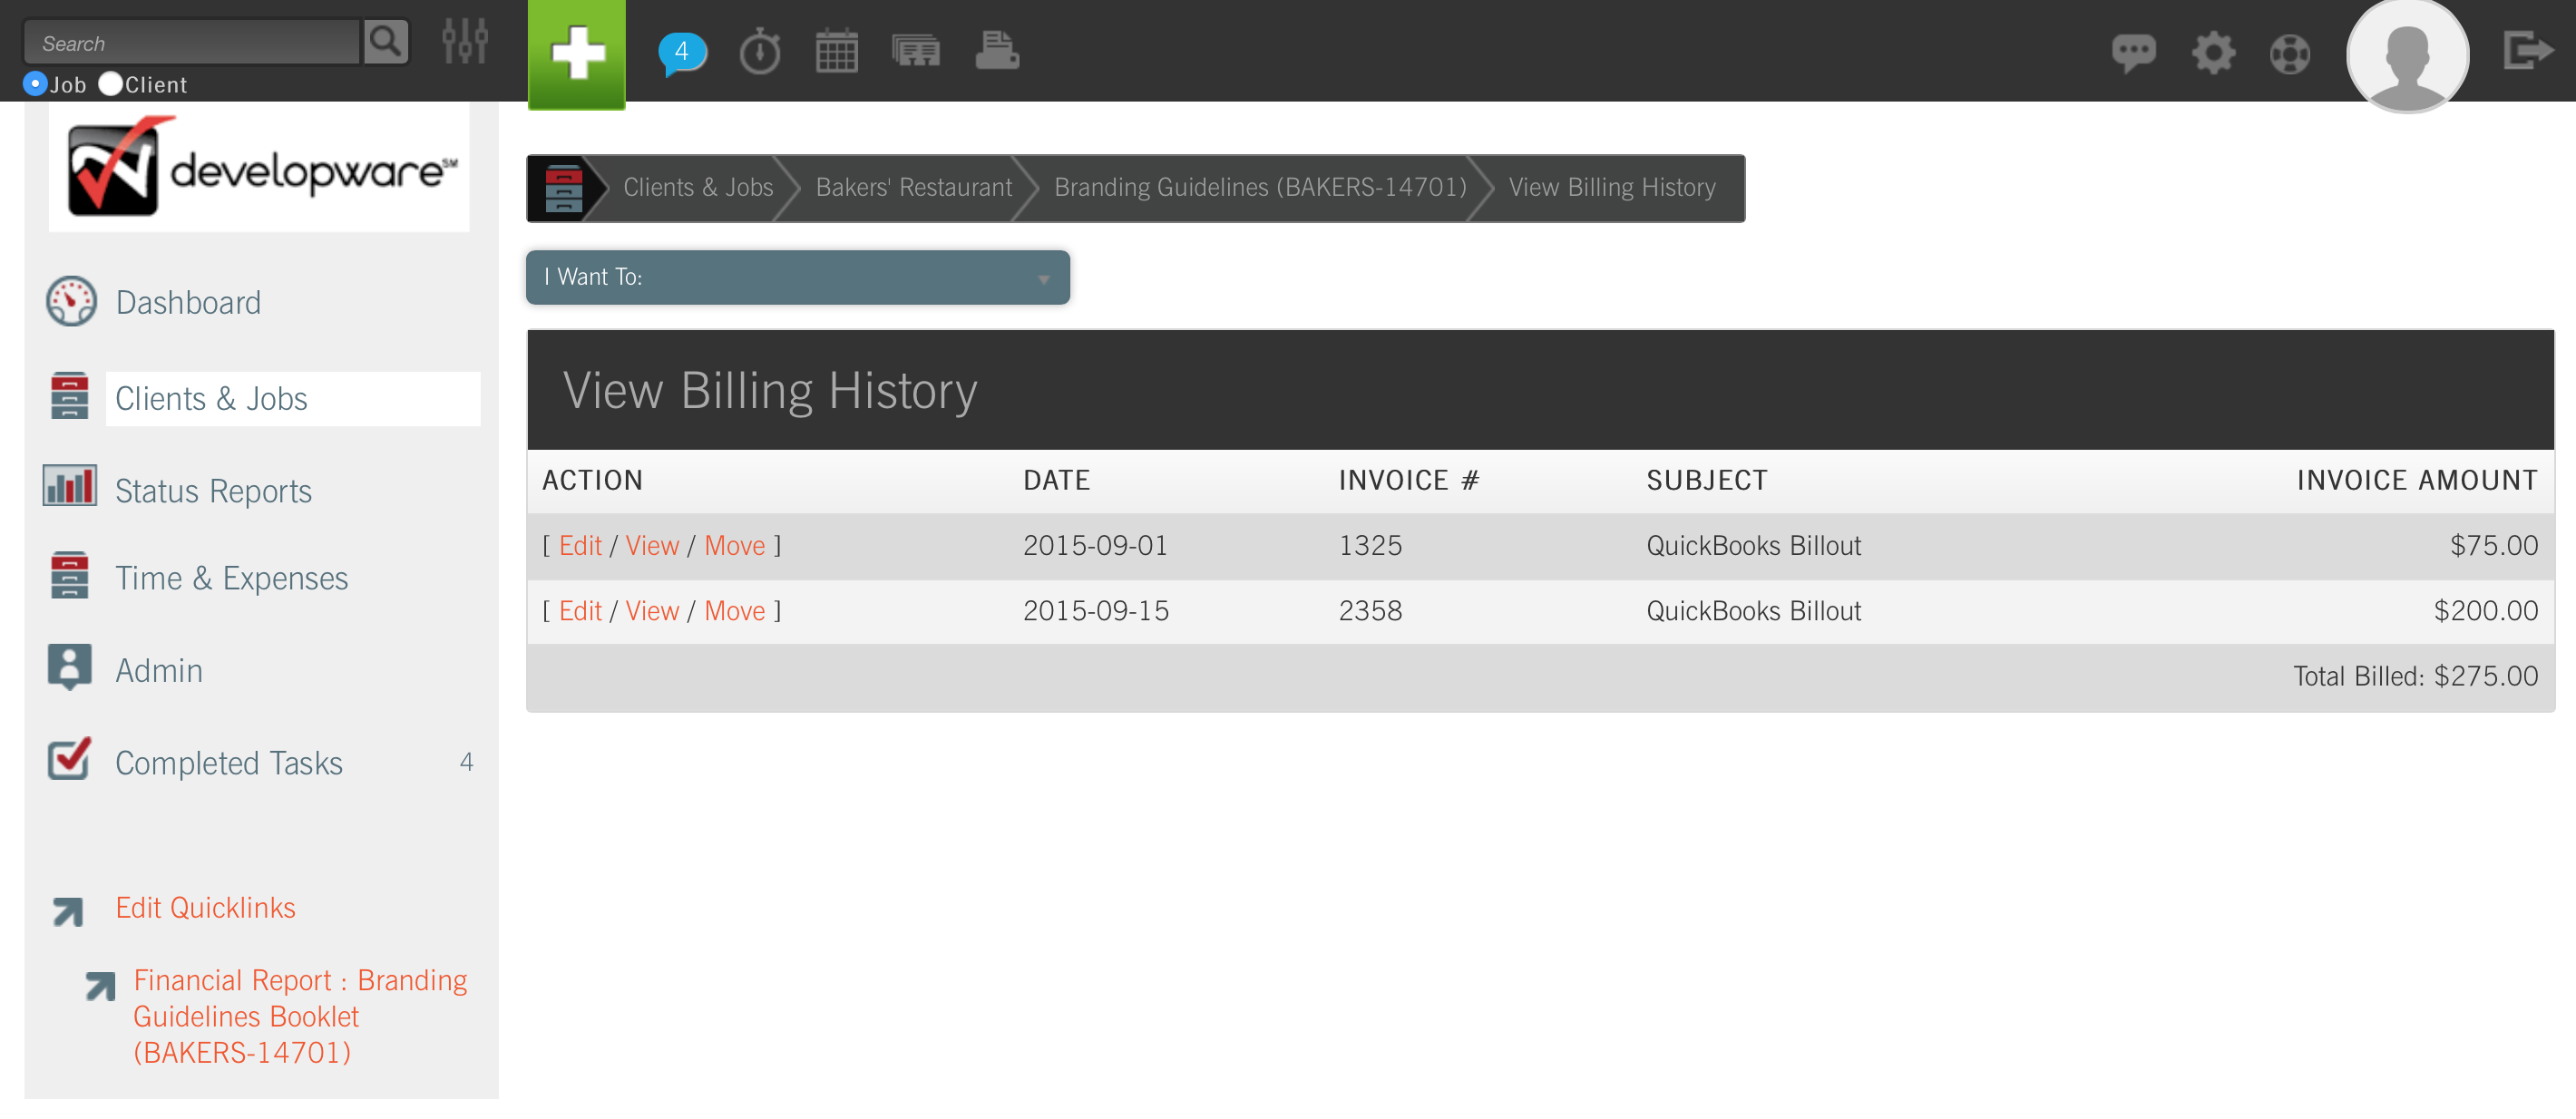
Once you’ve successfully finished the QuickBooks sync, navigate back to the job within CurrentTrack by going to Clients & Jobs — Client — Job One Sheet — I Want To: Prepare QuickBooks Worksheet. At the bottom of your Worksheet, or by clicking View QuickBooks Worksheet History in the job’s I Want to: drop-down menu, you can view everything you’ve submitted and what remains to be sent to QuickBooks at a later date.
NOTE: You must have Permission to View QuickBooks Worksheet History. To grant access, via the Manage Permissions interface, a System Administrator must go to Admin — System Administration — Manage Permissions. S(he) can then specify which Employee(s) should be allowed to View QuickBooks Worksheet History by entering the name(s) in the field provided.

The job’s CurrentTrack Billing History will now mirror the Invoices that appear in QuickBooks, via a corresponding Billing Entry. To view a job’s Billing History, go to Clients & Jobs — Client — Job One Sheet — I Want To: View Billing History. Modifications made to existing Billing Entries (e.g. Amount modified) will not be reflected in their corresponding QuickBooks Invoices.